Starting line的問題,透過圖書和論文來找解法和答案更準確安心。 我們找到下列問答集和資訊懶人包
Starting line的問題,我們搜遍了碩博士論文和台灣出版的書籍,推薦Walter Foster Jr Creative Team寫的 Horses & Ponies: Learn to Draw Using Basic Shapes--Step by Step! 和Walter Foster Jr Creative Team的 Birds & Butterflies: Learn to Draw Using Basic Shapes--Step by Step!都 可以從中找到所需的評價。
這兩本書分別來自 和所出版 。
明新科技大學 電機工程系碩士班 蘇信銘所指導 陳仕軒的 改良型無刷直流馬達無感測驅動器研製 (2021),提出Starting line關鍵因素是什麼,來自於無刷直流馬達、無感測驅動、相位超前補償、磁滯式轉態銜接。
而第二篇論文朝陽科技大學 資訊與通訊系 魏清泉所指導 張冠鈞的 具有中繼功能之LoRa圖像傳輸研究 (2021),提出因為有 物聯網、LoRa、展頻、中繼、切割率、傳輸時間的重點而找出了 Starting line的解答。
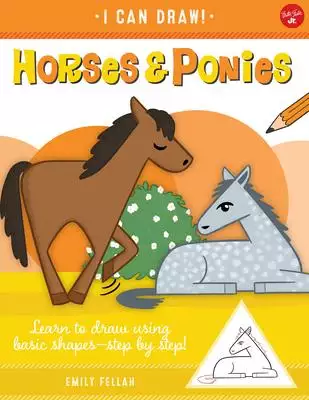
Horses & Ponies: Learn to Draw Using Basic Shapes--Step by Step!
為了解決Starting line 的問題,作者Walter Foster Jr Creative Team 這樣論述:
With I Can Draw: Horses & Ponies, young artists can use basic shapes and easy-to-follow, step-by-step projects to draw 15 of their favorite equines. A jumping horse, a prancing horse, and a Shetland pony are just some of the drawing projects included in this book. With 15 fun drawing projects
, I Can Draw: Horses & Ponies is a collection of some of kids’ most loved equines. All of the drawings are created with simple shapes that are easy for young artists to make, and the cute, simple illustrations are appealing and approachable to young ones. The book begins with an introduction to
drawing materials and instructions on how to use the book, and then it jumps right into the drawing projects. For a cute pony: Kids start with a rectangle, add a line, a curved line, and some more straight and curved lines. They are encouraged to keep following along with each step. As they make
their way through the multiple steps, all the new pencil marks to make are shown in a different color so it’s easy to know what to draw next. Once they near the end of the project, these young artists will start to see a drawing of a pony appear on their paper, and all they need to do now is add so
me color. Great job! Each title in the I Can Draw series features easy step-by-step drawing lessons for little artists. Starting with basic shapes, such as a square, a rectangle, a triangle, and a circle, children will discover how to draw a range of subjects, including animals, butterflies, flowe
rs, pets, and more! The books in the I Can Draw series provide the perfect introduction to drawing for budding artists. Have even more drawing fun with: I Can Draw: Wild Animals, I Can Draw: Favorite Pets, I Can Draw: Cats & Kittens, I Can Draw: Everything Cute & Cuddly, I Can Draw: Dogs &
amp; Puppies, I Can Draw: Princesses & Fairy Tales, I Can Draw: Birds & Butterflies, I Can Draw: Dinosaurs, and I Can Draw: Cars, Trucks, Trains & Planes.
Starting line進入發燒排行的影片
甘辛い照り焼きソースを絡めた牛肉とブロッコリーはご飯と相性ぴったり!
外は香ばしく焼き上げてカリカリ食感が楽しめます♪
ぜひ作って見てくださいね!
牛肉とブロッコリーの焼きおにぎり
12個分
材料:
白ごはん 4合分
■ソース
しょうゆ 120ml
はちみつ 85g
しょうが(みじん切り) 小さじ1/2
にんにく(みじん切り) 1片分
■具
サラダ油 大さじ1+大さじ2
牛もも肉(角切りステーキ) 225g
塩 小さじ1/2
コショウ 小さじ1/2
玉ねぎ(みじん切り) 小1/2個
ブロッコリー(粗みじん切り) 150g
コーンスターチ 大さじ1
水 大さじ1
白ごま 大さじ1/2
しょうゆ 120ml
青ねぎ(小口切り) 盛り付け用
作り方:
1. 白ごはんを4合炊く。
2. ソースを作る。カップにしょうゆ、はちみつ、しょうが、にんにくを入れ、よく混ぜる。
3. 具を作る。フライパンにサラダ油大さじ1を入れ、中火で熱す。牛肉、塩、コショウ を加え、焼き色がつくまで炒める。一度フライパンから牛もも肉を取り出す。
4. フライパンに玉ねぎとブロッコリーを入れ、玉ねぎが半透明になるまで炒めたら(2)を加える。
5. 小皿にコーンスターチと水を入れて混ぜ合わせ、 (4)に回しかける。ブロッコリーが柔らかくなってソースにとろみがつくまで、2-3分煮る。
6. (3)をフライパンに戻し入れ、白ごまを振りかける。混ぜたら火から下ろす。
7. 直径13cm程のボウルにラップを敷き、大さじ2の白ごはんをボウルの内側に押しつける。
8. 真ん中に(6)を大さじ1/3入れ、ごはんをかぶせる。ラップをボウルから剥がし、おにぎりを三角形に整形する。残りのごはんと具材で繰り返す。
9. フライパンにサラダ油大さじ2を入れ、中火で熱す。おにぎり2-3個をフライパンに入れ、焼き色がつくまで両面1-2分ずつ焼く。
10. 刷毛でしょうゆを全面に塗り、さらに焼く。
11. 青ねぎを振りかけたら、完成!
===
Beef and Broccoli Rice Balls
for 12 servings
Ingredients:
■RICE
3 cups japanese short grain rice(600 g)
3 cups water(720 mL)
■STIR FRY SAUCE
1/2 cup soy sauce(120 mL)
1/4 cup honey(85 g)
1/2 teaspoon ginger, minced
1 clove garlic, minced
■FILLING
1 tablespoon vegetable oil
1/2 lb boneless round steak(225 g), diced
1/2 teaspoon salt
1/2 teaspoon pepper
1/2 small yellow onion, finely chopped
1 cup broccoli(150 g), finely chopped
1 tablespoon cornstarch
1 tablespoon water
1/2 tablespoon sesame seeds
2 tablespoons vegetable oil
1/2 cup soy sauce(120 mL)
scallion, thinly sliced, for garnish
Preparation:
1. Make the rice: Wash the rice in a medium bowl of water, draining and refilling until the water is clear. Pour the washed rice into a large pot and add 3 cups (720 ml) of fresh water. Let soak for 30 minutes.
2. Place the rice on the stove over medium-high heat and bring to a boil. Cover, reduce the heat to low, and simmer for 12 minutes, or until all of the water is absorbed by the rice. Turn off the heat and let the rice rest with the lid on for 10 minutes, then fluff the rice and set aside until ready to use.
3. Make the stir fry sauce: In a liquid measuring cup or medium bowl, combine the soy sauce, honey, ginger, and garlic. Whisk to combine.
4. Make the filling: Heat the vegetable oil in a medium pan over medium heat. Add the beef, salt, and pepper and cook until the meat is browned and cooked all the way through, 3-4 minutes. Remove the beef from the pan.
5. Add the onion and broccoli to the same pan. Cook for 2-3 minutes, until slightly tender. Add the stir fry sauce. Combine the cornstarch and water in a small bowl and stir until cornstarch dissolves. Pour into the pan. Cook for 2-3 minutes more, or until the sauce is thick and the broccoli is tender.
6. Return the beef to the pan, add the sesame seeds, and stir until thoroughly combined. Remove the pan from the heat.
7. Line a 5-inch (13 cm) diameter bowl with plastic wrap. Scoop two tablespoons of rice into the bowl and use the back of a spoon (or your fingers) to flatten in an even layer against the inside of the bowl.
8. Add a ½ tablespoon of filling and top it off with a little more rice. Use the plastic wrap to mold the rice around the filling. Unwrap and use your hands to shape the rice into a triangle. Repeat with the remaining rice and filling.
9. In a medium pan, heat the vegetable oil over medium-high heat. Add 2-3 rice triangles to the pan and fry on each side for 1-2 minutes, or until the rice is crispy and starting to turn golden brown.
10. Brush soy sauce on all sides of the triangles and fry each side for another 1-2 minutes, or until dark golden brown. Repeat with the remaining triangles.
11. Sprinkle the rice triangles with scallions, then serve.
12. Enjoy!
#TastyJapan
#レシピ
MUSIC
Licensed via Audio Network
改良型無刷直流馬達無感測驅動器研製
為了解決Starting line 的問題,作者陳仕軒 這樣論述:
本論文主要是研製一改良型無刷直流馬達無感測驅動器,本驅動器主要應用在車用無刷直流馬達風扇控制,輸入電壓範圍是10伏特~20伏特。本實驗控制核心是瑞薩電子公司RL78/F14數位訊號處理器R5F10PGG,用來實現無感測之馬達定位、啟動、驅動及保護等功能。為使無感測驅動器能達到可靠的啟動,在馬達開迴路啟動前藉判斷輸入電壓,給予所需的啟動參數。由實驗結果發現,模擬的霍爾訊號與原始霍爾訊號有角度誤差,因此使用軟體程式對落後訊號做相位超前補償。為使驅動波形在轉態時更加穩定,在相位未超前驅動波形轉態為相位超前驅動波形時,加入磁滯轉態銜接策略。最後針對馬達在驅動時若受到擾動,在軟體中設計保護判斷,經實驗
驗證能有效防止擾動造成的故障。
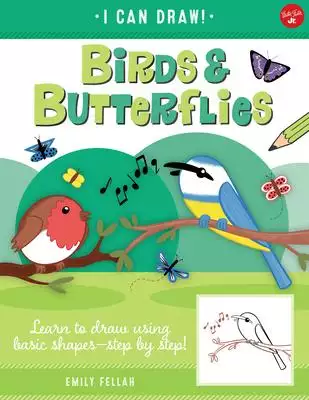
Birds & Butterflies: Learn to Draw Using Basic Shapes--Step by Step!
為了解決Starting line 的問題,作者Walter Foster Jr Creative Team 這樣論述:
With I Can Draw: Birds & Butterflies, young artists can use basic shapes and easy-to-follow, step-by-step projects to draw 15 beautiful winged creatures. The Toucan, Bald Eagle, and Monarch butterfly and are just some of the flying animals included in this book. With 15 fun drawing projects,
I Can Draw: Birds & Butterflies is a collection of some of the most beautiful winged creatures. All of the drawings are created with simple shapes that are easy for young artists to make, and the cute illustrations are appealing and approachable to young ones. The book begins with an introduct
ion to drawing materials and instructions on how to use the book, and then it jumps right into the drawing projects. For a Monarch butterfly: Kids start with a square, add a line, a curved line, and some more straight and curved lines. They are encouraged to keep following along with each step. As
they make their way through the multiple steps, all the new pencil marks to make are shown in a different color so it’s easy to know what to draw next. Once they near the end of the project, these young artists will start to see a drawing of a butterfly appear on their paper, and all they need to
do now is add some color. Great job! Each title in the I Can Draw series features easy step-by-step drawing lessons for little artists. Starting with basic shapes, such as a square, a rectangle, a triangle, and a circle, children will discover how to draw a range of subjects. The books in the I Ca
n Draw series provide the perfect introduction to drawing for budding artists. Have even more drawing fun with: I Can Draw: Wild Animals, I Can Draw: Favorite Pets, I Can Draw: Cats & Kittens, I Can Draw: Everything Cute & Cuddly, and I Can Draw: Dogs & Puppies.
具有中繼功能之LoRa圖像傳輸研究
為了解決Starting line 的問題,作者張冠鈞 這樣論述:
在物聯網(IOT)的應用中,以公里為單位的長距離圖像傳輸的研究日益增多,但當進行長距離圖像傳輸的過程,有可能會被高大的建築物或障礙物給阻擋,導致封包遺失和接收不到的情況,因此需要中繼節點來避開被阻擋的路徑。如果使用Wi-Fi來進行遠距離傳輸圖像,會消耗大量的功耗,而且只適合短距離傳輸;藍芽(Bluetooth)雖然是低功耗技術,但只適合短距離傳輸。而LoRa(Long Range) 是一種低功耗、廣域網路的無線傳輸技術,因此在本論文中我們使用LoRa來當作長距離圖像傳輸的技術。在本研究論文,我們主要使用樹莓派搭配LoRa來設計圖像之多重跳躍傳輸(Multi-Hopping Transmiss
ion)。我們首先提出利用不同展頻因子(SF, Spreading Factor)的訊號之間會互相正交的特性,來設計一個可以同時發射與接收的中繼器,以減少傳輸延遲及封包碰撞,圖像格式使用JPEG圖像壓縮及16進制編碼,中繼器內部使用MQTT進行通訊。此外為了在同一時段平衡各中繼節點的負擔,避免中繼節點的閒置時間過長,在開始傳送前,我們也首先提出把圖像依不同比例來分割,分批進行傳送較小的圖檔,如此便可減少中繼節點的閒置時間,進而降低整體傳送時間,影像感測與發射節點實際測試的位置在台中市大里區大峰橋上,接收節點設置在朝陽科技大學人文大樓9樓,在這二點之間的距離約為2公里,兩者之間因有遮蔽物擋住,故
無法直接通訊,中繼節點設置在發送端和接收端之間為視線(Line-of-Sight)的情況,中繼節點數目為N,我們進行N=1、2及3及不同圖像切割率(Cutting Ratio)的情形下的實驗,實驗結果發現進行圖像切割時,確實可以把傳送時間降低,而且當切割率=1/(N+1)時,有最佳的狀態,可以得到最低的傳輸時間,結果顯示透過中繼節點,在不被遮蔽物擋住的情況進行圖像傳輸,使用LoRa進行多跳傳輸圖像是可行的。